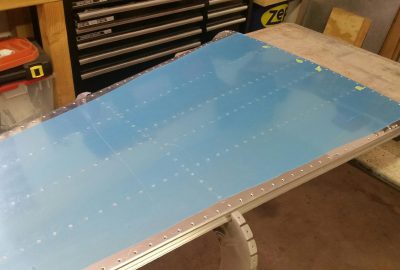
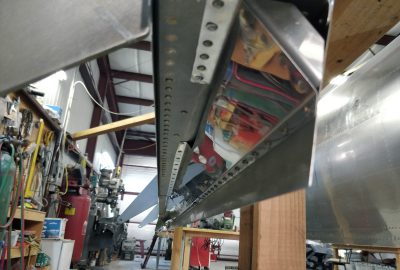
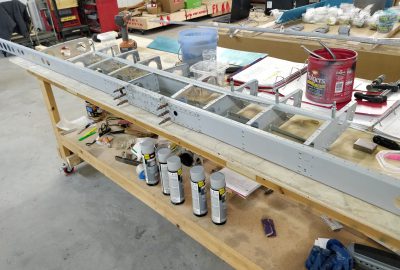
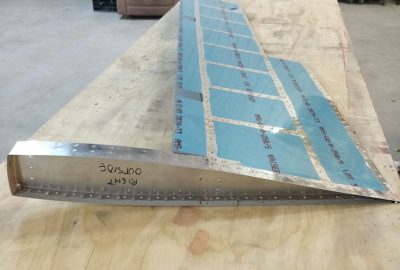
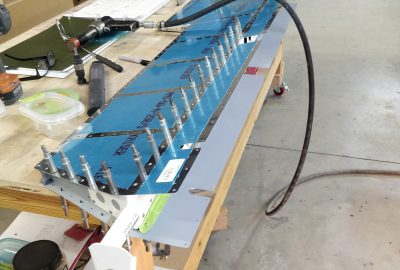
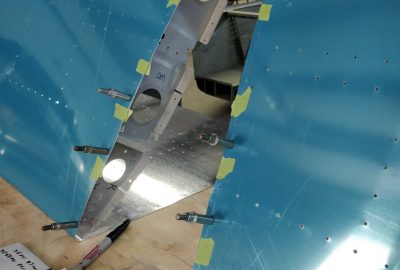
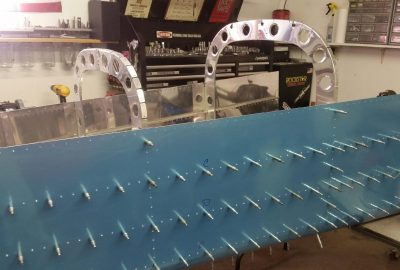
Belly pan is taking shape
Started clecoing the belly skin to the skeleton frames. Then on to riveting, yes there are an enormous number of rivets in the tail section…
Started on the tail section on Halloween. I didn’t take a lot of pictures early on the process so this post represents 10/31 and 11/1. Brackets made, angle aluminum cut. Tons of parts to debur, J-channel to cut and match drill. A bit tedious…
Headed to see my parents in the afternoon so it was short day. I was able finish mounting the Rami Nav antenna to the top of Vertical Stabilizer after starting the fabrication of the doubler yesterday. Also on the Wing front – got the pitot mast prep’d and primed. Right wing skin is primed.
Just seven final hours to finish the riveting the Horizontal Stabilizer. I was glad to get this done because the small gaps to reach in with a bucking bar led to some awkward positions and a sore back. Multiple breaks for some yoga stretching was required the past couple of days. The right wing skin was cleco’d and match drilling…
Wow, I can admit I’m not the fastest riveter. I check every rivet with a gauge and often have to hit it a time or two extra. Today I pounded around 500 rivets. Just 300 more to go on the Horizontal Stabilizer. Also knocked off was riveting the wing gap fairing. Went to start on the wing skins only to…
Not a day of massive visual progress but a good start to the riveting of the Horizontal Stabilizer. I had missed the counter sinking of the front spar and stringers, so that was a few hours. I think what happened is I countersunk the rear spar and headed off for lunch and by the time I got back to work…
So I am learning the lesson on how long things take when you deviate from the plans. First, I have to say the past two days designing parts and figuring things out myself has been fun. But…it is very time consuming. Take the PH Aviation flap bracket. I chose to design something myself and I think I’m on design rev…
The day started with three hours of finishing the Elevators. Whew, this section too quite a bit more effort than I had expected. Will be interesting to see how long the Horizontal Stabilizer takes to assemble/rivet… From there, assembly of the aileron push tubes and aileron roll trim bracket. Fabrication of new brackets for the PH Aviation flap actuator. Started…
Man oh man, I thought by early afternoon I’d have both Elevators buttoned up (sans the leading and trailing edges). Ha! The counter-balance attachment (with six tough to reach rivets and rivets of various sized to keep track of) slowed me to a crawl as did Short story, right side is 100%, left side needs the counter-balance and rivets requiring…
The day started deburring the remaining parts for the Horizontal Stabilizer followed by dimpling the skins. Sweet Jesus are there a lot of holes to dimple. Then priming prep followed by priming the last Horizontal Stabilizer parts. Not to be forgotten the front and rear spars holes were countersunk. Back to the Elevators, I riveted the ribs and then installed…
The day started with a few hours of deburring ribs. Not my favorite part of the build, then I primed a bunch of parts and set them aside to dry. I deburred the edges of the HS skins and then marked with tape the holes that are not to be riveted. Then came the assembly of the entire HS stabilizer,…
The morning started with priming parts for the Horizontal Stabilizer. Then an exciting step, hung the QB wings in the rack and got the aileron bracket and Garmin autopilot servo installed. A good chunk of the day was spent assembling the Horizontal Stabilizer Front and Rear spars. Quite a lot of riveting and even more to come. But my riveting…